We are constantly updating this page as we get feedback from our customers.
If you can't find your answer here, please contact us at royalpixelsenvato@gmail.com
We are constantly updating this page as we get feedback from our customers.
If you can't find your answer here, please contact us at royalpixelsenvato@gmail.com
We are aware of the issue that is happening with the latest 24.2.1 version of Premiere Pro.
Adobe confirmed that in this update one of the functions in their ExtendScript stopped working. This caused many extensions that rely on this function to not work properly.
After the reports from us and other developers, Adobe has confirmed via their official forum that they have already fixed the issue, and it will be released with the upcoming 24.3.0 version, expected at the end of this month. Check their post over here.
However, I found that the apparent bug in the latest version is still very easy to fix by a user, with very small adjustments. I will show you how to do it right here.
If you use any other version of Premiere Pro, you won’t have this problem at all - MYFX Extension works flawlessly there.
As soon as the 24.3.0 version is released by Adobe, make sure to update and everything will be back to normal.
I hope for your understanding as such matters are completely out of my hands, as it's fully dependent on Adobe’s developers.
Purchase code is located in your Downloads section on videohive - https://www.videohive.net/downloads.
Once you're on the page, click on the download button of the pack that you're installing and choose License certificate & purchase code.
Your purchase code will be inside the text file.
For more information, visit here.
Please make sure that you're copying the purchase code from the correct pack in your downloads page on videohive..
If you have successfully copied and pasted the correct purchase code in the verification field but still getting an error, please email us at royalpixelsenvato@gmail.com
First, try to install MYFX using ZXPInstaller from aescripts.com - Download here. .
If for some reason you're still not able to install MYFX extension using ZXP Installer, you'll have to install it manually.
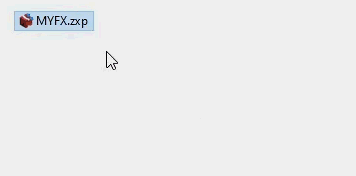
To do that, first rename the file type of MYFX extension from ZXP to ZIP and then extract the files as it's shown below:
After successfuly exctracting the files, you should have a folder named MYFX with all the necessary files inside it, which you should then copy and paste in the following location:
Windows: Program Files (x86)\Common Files\Adobe\CEP\extensions\
MacOS: Library/Application Support/Adobe/CEP/extensions
Note: if folders CEP and Extensions doesn't exist in the mentioned directories – create them manually.
For help, email us at royalpixelsenvato@gmail.com
If you're getting the GPU Render Error / Unable to Produce Frame or Accelerated Renderer Error while rendering the video using Media Encoder, simply switch to the Software Encoder - Click here to see how.
This error might appear with only a few transitions when rendering with 4K resolution, when your GPU can't handle to process the transition effect. So you just need to process it using your CPU.
If this won't resolve the issue, please email us at royalpixelsenvato@gmail.com
If you're having a hard time applying a transition and getting In and Out texts, watch this video.
If you still have questions, please email us at royalpixelsenvato@gmail.com
If the MYFX window doesn't open from Window > Extensions > MYFX then you simply need to enable the PlayerDebugMode.
For Windows, download this archive that contains RegEdit files, simply run the script files and it's done! If you'd rather do it manually, watch this video.
For Mac, it's much easier. Open Terminal and enter the following lines one by one. Meaning, copy/paste the first line and hit Enter. Then copy/paste the second line and hit Enter.
defaults write com.adobe.CSXS.12 PlayerDebugMode 1
defaults write com.adobe.CSXS.11 PlayerDebugMode 1
defaults write com.adobe.CSXS.10 PlayerDebugMode 1
If this won't resolve the issue, please email us at royalpixelsenvato@gmail.com
Firstly, make sure that MYFX Extension has access to internet connection. If you have VPN or Firewall installed, it might block the internet connection.
If the MYFX extension's window is still empty and only showing the top menu bar, then you simply need to enable the PlayerDebugMode.
For Windows, download this archive that contains RegEdit files, simply run the script files and it's done! If you'd rather do it manually, watch this video.
For Mac, it's much easier. Open Terminal and enter the following lines one by one. Meaning, copy/paste the first line and hit Enter. Then copy/paste the second line and hit Enter.
defaults write com.adobe.CSXS.12 PlayerDebugMode 1
defaults write com.adobe.CSXS.11 PlayerDebugMode 1
defaults write com.adobe.CSXS.10 PlayerDebugMode 1
If this won't resolve the issue, please email us at royalpixelsenvato@gmail.com
If auto update is stuck on 100%, then you can install the new version of MYFX manually.
1. Go to royalpixels.org and download the latest version of MYFX.
2. Install it using ZXP Installer - click here to see how.
That's it!