IMPORTANT: Media Replacement not showing in the Properties in the latest Premiere Update (26.2.2)
In the latest update of Premiere Pro (26.2.2) there's a bug that prevents Media Replacement from showing in the Properties panel.
Adobe has confirmed this bug in this post and is working on a fix. In the meantime, you can use the following workaround to show Media Replacement in the Properties panel:
1. Enable Linked Selection
2. Apply a transition from MYFX Extension as you normally would.
3. Deselect, and re-select the MOGRT transition.
If something's not clear, please watch this video.
Alternatively, you can roll back to Premiere Pro 26.0.2 and everything will be working as expected.
2. Open ZXP Installer and drag & drop the MYFX v3.1.3 Extension zxp file that comes with the project, into the ZXP Installer window:
3. Once it's installed, you can open MYFX Extension by going to Window > Extensions > MYFX
4. To install a pack, click on the Install button inside MYFX Extension, and select the *.install file of the pack
Troubleshooting: Install MYFX Extension manually
If you're still unable to install the MYFX extension using ZXP Installer, you'll need to install it manually.
To do that, first rename the file type of MYFX extension from ZXP to ZIP and then extract the files as it's shown below:
 After successfuly extracting the files, you should have a folder named MYFX with all the necessary files inside it, which you should then copy and paste in the following location:
Windows: Program Files (x86)\Common Files\Adobe\CEP\extensions\
MacOS: Library/Application Support/Adobe/CEP/extensions
Note: if folders CEP and Extensions doesn't exist in the mentioned directories, create them manually.
After successfuly extracting the files, you should have a folder named MYFX with all the necessary files inside it, which you should then copy and paste in the following location:
Windows: Program Files (x86)\Common Files\Adobe\CEP\extensions\
MacOS: Library/Application Support/Adobe/CEP/extensions
Note: if folders CEP and Extensions doesn't exist in the mentioned directories, create them manually.
Troubleshooting: MYFX Extension won't open
If MYFX Extension doesn't open from Window > Extensions > MYFX - it's because PlayerDebugMode needs to be enabled to 1 on your device.
For Mac: Open Terminal and enter the following lines one by one. Meaning, copy/paste the first line and hit Enter. Then copy/paste the second line and hit Enter.
defaults write com.adobe.CSXS.13 PlayerDebugMode 1
defaults write com.adobe.CSXS.12 PlayerDebugMode 1
defaults write com.adobe.CSXS.11 PlayerDebugMode 1
For Windows: download this archive that contains RegEdit files, simply run the script files and it's done!
If you'd rather do it manually, firstly, check out this video for insight, and afterwards, follow these steps:
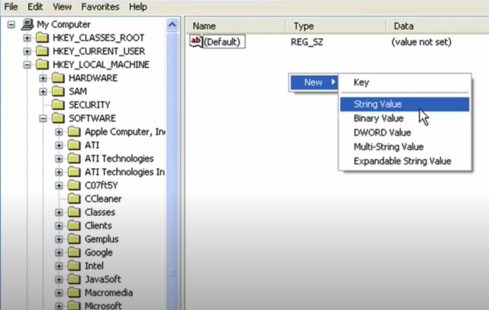
1. Open RegEdit
2. Check the CSXS folders. There will be CSXS.11 and CSXS.12
3. Make sure that in both of those folders there is a string named PlayerDebugMode and it's set to 1
4. If there is no string like that in any of those folders, you need to create it manually
5. To do that: Right-click > New > String Value > name it PlayerDebugMode and set it to 1.
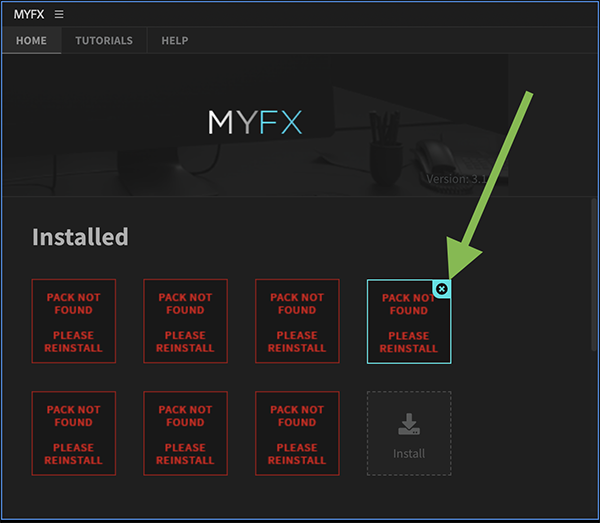
Troubleshooting: Pack Not Found
If installed packs are showing PACK NOT FOUNT thumbnail, it means that the project files have been either deleted, or moved to a different location on your device, so MYFX Extension can't see them anymore.
 To fix this:
1. Remove missing packs from MYFX Extension by clicking on the X icon on their top-right corner, as it's shown in the image above.
2. Download project's ZIP archive from Envato, unarchive it, and install it again from MYFX Extension by clicking on Install icon and selecting the *.install file
To fix this:
1. Remove missing packs from MYFX Extension by clicking on the X icon on their top-right corner, as it's shown in the image above.
2. Download project's ZIP archive from Envato, unarchive it, and install it again from MYFX Extension by clicking on Install icon and selecting the *.install file
Troubleshooting: Unable to locate MOGRT file
If you're encountering an “Unable to Locate MOGRT File” error in Premiere Pro, it's typically caused by the file path on your system. If the path contains non-English characters, Premiere Pro may fail to recognize or access the file.
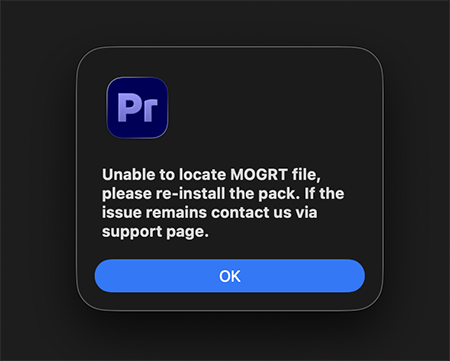 To resolve this, move the transition's project folder to your Desktop. Then remove the pack from the MYFX extension and reinstall it from that location. Alternatively, you can place the folder in your Documents directory and reinstall from there.
Troubleshooting: Properties panel unavailable in Premiere Pro
If Properties Panel isn't available for you, this means that you are using Premiere Pro 2024 or lower. In those versions, you should use Essential Graphics panel instead of Properties panel.
If you have any questions or need help with the project, contact us at royalpixelsenvato@gmail.com - We answer to all of your messages!